Setting up a log system with AWS OpenSearch (P2) - Google Authentication
byGink▻ Thu, 02 May 2024
Prerequisite
Before continue on ingrating Google Authentication to AWS Congito. Let's check on what we've done in the previous session.
- Create 2 roles for 2 different user groups
- Configure user pool and identity pool in AWS Cognito
- Create an OpenSearch domain to save log data.
- Conect these pools to OpenSearch so users from the pool can login OpenSearch Dashboard already.
If you haven't done above steps, please check the article here.
Requirements
Now we have an OpenSearch domain for log data storage. And users from master group can login the Dashboard already. But only the master user can login seems to be a bad idea for a log system. Our developers are the ones who really need that.
The master can add more internal users inside OpenSearch, but as mentioned before. That's not cool at all, it's tedious and somewhat insecure. We should let the developer access via organization email, which is commonly provided by Google.
Step by Step
1. OpenSearch: Grant permission inside OpenSearch to limited role
Remember the log-center-master-user-role and log-center-limited-user-role we created before? We already assign the master user with log-center-master-user-role ARN when creating OpenSearch domain.
When we specified that ARN as the master user. OpenSearch actually mapped it to an internal role inside named all_access which has full permission on the cluster.
Now we need to create another internal role with less permissions for log-center-limited-user-role and map it to this role ARN.
- Go to OpenSearch Dashboard. Login with the master user account.
- On the left menu: Managements > Security > Roles > Create Role
- Specify the role name, cluster permissions as well as index permissions for it and create.
- Click on the created role > Mapped users > Manage mapping
- Now we need the ARN of
log-center-limited-user-rolefrom AWS IAM console. - Copy that ARN and add it as another backend role inside OpenSearch.
2. Google Cloud Console: Create a new project
- Head to https://console.cloud.google.com/ to create a new project. You may need to create an organization email before able to use organization for this project.
- After the project is created successfully. Go to OAuth consent screen and update authorized domains.
- Probably your Cognito domain and OpenSearch domain should be updated here.
- Then create the credential: Credentials > OAuth client ID > Web Applications
- Update Authorized redirect URIs which is Cognito domain with the redirect path.
- If your Cognito domain is
example.comthen this redirect uri should behttps://example.com/oauth2/idpresponse. - You may have multiple Cognito domains (including custom one), so let's update all of redirect URIs here respectively.
- Finish this screen and you will have a Client ID and a Client secret. Remember to back up and keep them safe as we will need them for the next step.
3. Cognito: Add Google provider to the user pool
- Now back to the user pool inside AWS Cognito > Sign-in experience tab > Federated identity provider sign-in
- Click on Add identity provider > Google > Update the Client ID and Client secret here.
- In Authorized scopes, type in
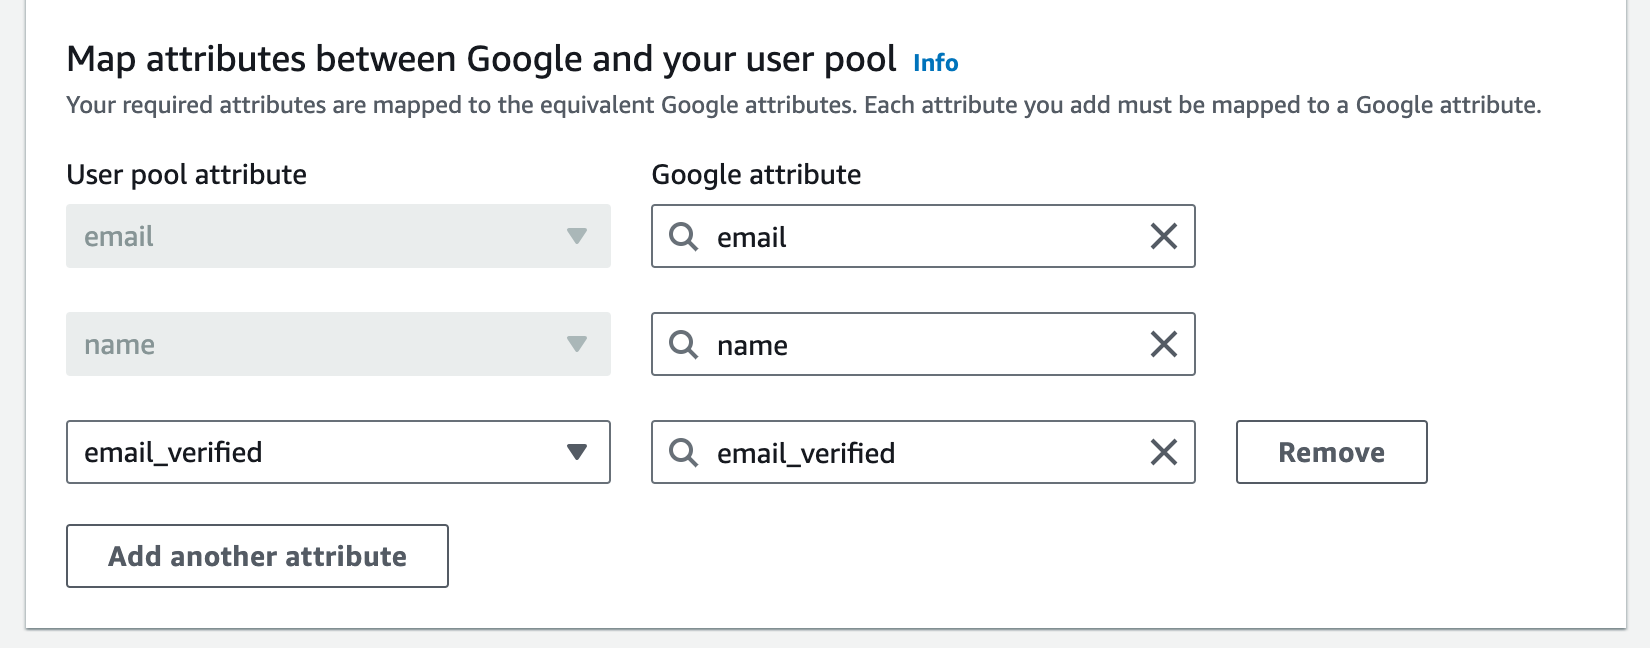
openid email profile - In Map attributes section, map the left attribute with the same attribute from Google.
- There should be at least
nameandemailare required. - To be able verifying user email from Google automatically, you may need to add another attribute
email_verifiedand map with the same one from Google atribute. This will let Google users can login Cognito without any further verification step.
- There should be at least
4. Cognito: Enable Google identity for the app client of this pool
- In App integration tab > App client list
- There should be one client that's created by OpenSearch here. You can remove the other one which is created since the first time if it's not needed.
- Click on the OpenSeach app client > Hosted UI > Edit
- Look for Identity providers, open the dropdown list and enable Google.

- You may see a list of Allowed callback URLs in this screen. Let's update them back to the Authorized redirect URIs in Google project.
Now save it and you should be able to login to OpenSearch Dashboard by Google ogranization email already.
5. OpenSearch: Grant permission for Google users
A lot of things had been done but then our users just hit another error page. OpenSearch complains that there's no permission for this backend role. Sighz.
Now you remember about the log-center-limited-user-role we created at the first time in previous article?
- Go to AWS IAM and copy that role's ARN.
- In Cognito user pool > Groups tab > Look for the group created by Google provider > Edit > Update IAM role to
log-center-limited-user-role. - In OpenSearch Dashboard > Security > Roles > Look for an appropriate role, you may create another one if needed.
- Then open that role > Mapped users > Manage mapping > Add another backend role > And paste the ARN of
log-center-limited-user-rolehere.
Let's try login by Google again. If you follow these steps by steps exactly. Things should work now.
Voila! We've done a great job ☘️. In the next article, I'll explain how to ship log data from EKS or any K8s cluster to this log system.
© 2016-2026 GinkCode.com